
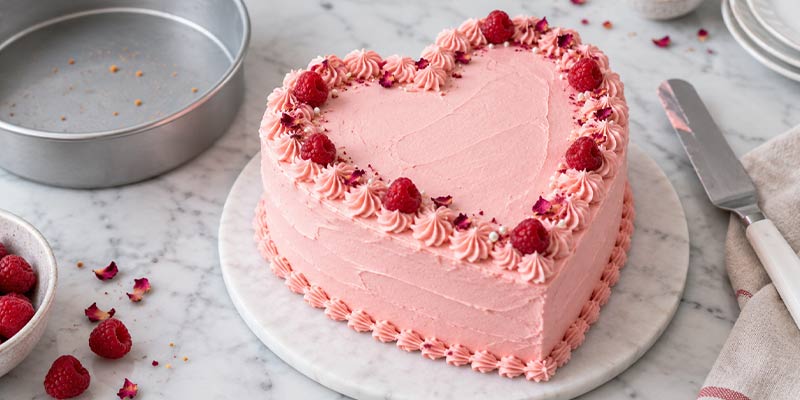
A heart-shaped cake instantly makes a celebration feel more thoughtful. Whether it is for Valentine’s Day, an anniversary, a birthday, or simply a sweet surprise for someone you love, the design adds warmth before the first slice is even served. The good news is that you do not need to buy a special baking tin to create one.
With a little cutting and some careful decorating, you can make an impressive heart-shaped cake from a round pan right in your kitchen. The technique is simple enough for beginners and gives you plenty of room to customise the flavour, filling, and decoration.
Here is everything you need to know.
Table of Contents
What You Will Need
Before you begin, gather your baking and decorating essentials. Having everything ready makes shaping and assembling the cake much easier.
You will need:
- One round cake pan
- Your preferred cake batter
- Baking paper
- A sharp knife
- Cake board or serving plate
- Buttercream, ganache, or frosting
- Offset spatula or regular spatula
- Piping bag, if required
- Sprinkles, fruits, chocolates, or other decorations
You can use almost any cake flavour for this method. Chocolate, vanilla, red velvet, strawberry, butterscotch, and fruit cakes all work well. Choose a cake that is firm enough to cut without crumbling excessively.
Step 1: Prepare Your Cake Batter
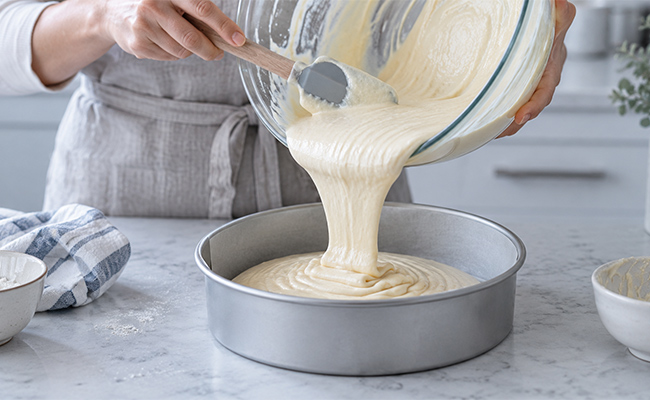
Begin with your favourite cake batter. If you are following a heart shape cake recipe, prepare the batter according to its instructions, but bake it in your regular round tin instead of a speciality mould.
Grease the pan well and line the base with baking paper. This prevents the cake from sticking and makes it easier to remove once baked.
Pour the batter into the prepared tin and gently tap the pan against the worktop. This helps release large air bubbles and encourages an even bake.
Step 2: Bake the Cake
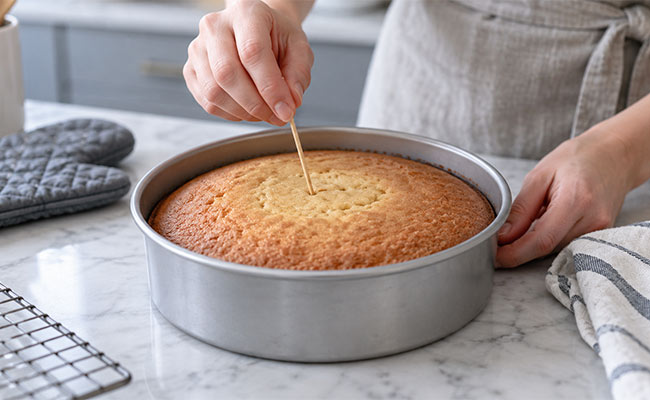
Bake according to the temperature and timing recommended by your recipe. Avoid opening the oven repeatedly, especially during the first half of baking, as sudden temperature changes can cause the centre to sink.
To check whether the cake is ready, insert a skewer or toothpick into the centre. If it comes out clean or with only a few moist crumbs, remove the cake from the oven.
Let it cool in the pan for about ten minutes before transferring it to a wire rack.
The cake must cool completely before shaping. Cutting a warm cake can cause it to tear, crumble, or lose its structure.
Step 3: Turn the Round Cake Into a Heart
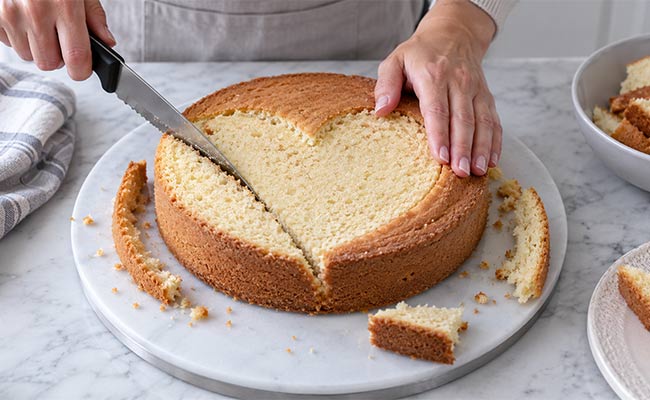
This is where the transformation begins.
Place the cooled cake on a clean cutting board. To make a heart cake from round cake, you need to be a little careful.
Imagine that the cake is divided into four sections. Start by identifying the bottom point of your heart. Trim away small curved portions from the lower left and lower right sides of the cake so the remaining section tapers towards a point.
Next, create the top indentation. Make a small V-shaped cut from the upper centre of the cake. Do not cut too deeply at first. You can always remove more cake if needed.
Gradually refine the curves until the cake resembles a symmetrical heart. This is the most important step in making a heart shape cake from a round pan.
Keep the trimmed cake pieces aside. Enjoy them as cake bites, layer them into dessert cups, or mix them with frosting to make cake pops.
Step 4: Level and Layer the Cake
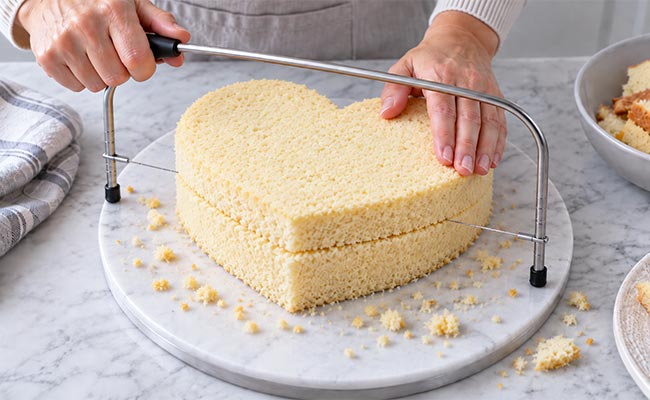
If your cake has risen into a dome, carefully trim the top so that it sits level.
For a more decadent result, slice the cake horizontally into two or three layers. Spread your chosen filling between each layer. Buttercream, chocolate ganache, whipped cream, fruit compote, caramel, or cream cheese frosting can all work beautifully.
Avoid adding too much filling near the edges, as it may squeeze out when you stack the layers.
Once assembled, check the shape again and make any final small trims before frosting.
Step 5: Apply a Crumb Coat
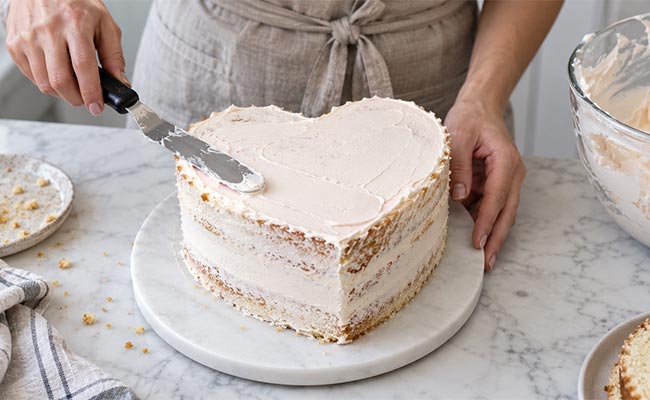
A crumb coat is a thin first layer of frosting that traps loose cake crumbs and creates a smooth base for the final decoration.
Spread a light layer of frosting over the top and sides of the cake, paying close attention to the pointed bottom and curved upper sections.
Refrigerate the cake for about 20 to 30 minutes, or until the crumb coat feels firm.
This simple step can make a major difference to the finished appearance.
Step 6: Add the Final Frosting
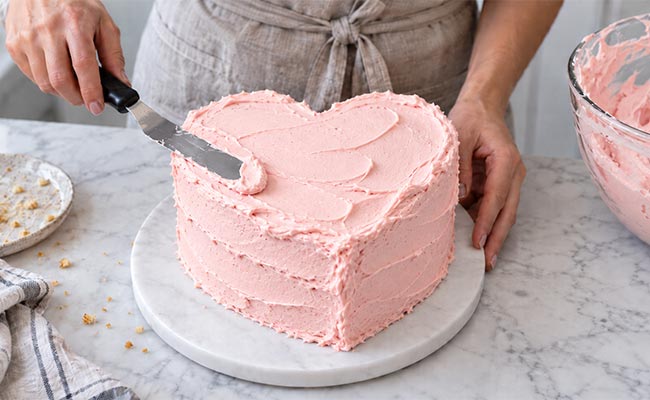
Once the crumb coat is chilled, cover the cake with a thicker, smoother layer of frosting.
Start at the top and work towards the edges. Then frost the sides, following the heart’s curves carefully.
For a rustic homemade finish, use the back of a spoon or spatula to create gentle swirls. For a cleaner appearance, smooth the frosting with an offset spatula.
Now, it is up to you whether you want your heart shape cake to be simple, colourful, elegant, or playful.
Step 7: Decorate Your Cake
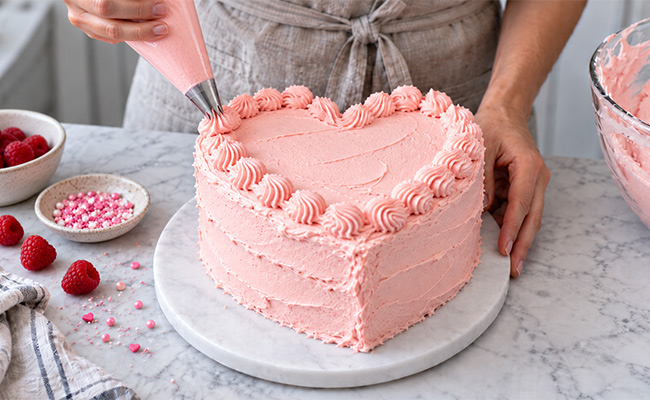
This is the final step in making a heart shape cake from a round pan. Decorating is what pulls everything together.
For a romantic look, consider red or pink buttercream, fresh strawberries, cherries, chocolate hearts, or piped roses. For birthdays, add colourful sprinkles, chocolates, personalised messages, or small decorative toppers.
A minimalist cake can look equally striking. Smooth white or pastel frosting paired with a short handwritten message can create a stylish finish without requiring advanced decorating skills.
If piping borders around the cake, begin at the bottom point and work carefully around both curves. Keeping the piping size consistent will make the final design appear neater.
Tips for Getting the Shape Right
Don’t worry if the heart doesn’t look perfectly symmetrical after the first cut. Remove small amounts of cake at a time rather than making large cuts. It can also help to sketch a heart on baking paper and place it lightly over the cake as a cutting guide. Use a sharp serrated knife and saw gently. Pressing down hard can crush the crumb and make clean shaping difficult. Chilling the cake briefly before cutting can also help if the sponge is particularly soft.
However, if you don’t feel confident carving the shape or simply don’t have the time, consider ordering a heart shape cake online. While making a cake at home can be rewarding, sometimes convenience matters.
Wrapping Up
Some of the best baking ideas come from working with what you already have. Turning a simple round cake into a heart is one of those little kitchen tricks that feels surprisingly satisfying once you see the finished result.
More importantly, the handmade touch gives the cake a charm that a perfect mould cannot always create. Add a favourite flavour, a meaningful message, or decorations inspired by the person you are making it for, and the cake becomes far more personal than its shape alone.
